SandBoxTime
Friday, December 5, 2025
Yoshino Cherry - Group of Nine

Monday, October 20, 2025
Scorcher II Overview
This video is about my Scorcher II and its capabilities. The Scorcher II is a hot wire burner. Meaning it uses a hot nichrome wire to burn, scorch, cut, drill, bend, branding, etc. The Scorcher II can be use on a variety of materials such as: Styrofoam, Leather, and Wood, really only limited by your imagination.
Tuesday, July 8, 2025
Filigree
Item Number | 1027 |
Type Item | Hollow Form with Piercing
|
Wood Species | Unknown (maybe Ash) |
Year Completed | 2025 |
Month Completed | July |
Wood Source | Unknown |
Size | 4.5” tall x 3.5 ” dia |
Finish | Dark walnut oil based stain. Three coats of oil based special blend - learned from J Paul Fennell. |
Tuesday, November 5, 2024
Cinderella
Deep clockwise spiral pyrography made using 11awg wire nichrome wire.
Poplar
Saturday, August 3, 2024
Scorcher II My DIY Pyrography Burner
Being frustrated by not being able to use 16-, 14-, and 12-gauge nichrome 60 wire in my art and woodturnings, I designed and built an awesome pyrography burner that I call the Scorcher II.
Since I started woodturning in 2005, I have used converted battery chargers for my pyrography (scorching or branding), but their performance was barely adequate for my needs, not to mention the fact that I have burned up three of them.
A couple of months ago I said to myself, "you have the skills, knowledge, and experience to build a machine that will meet your needs - so get busy and do it."
I made a prototype that worked better than expected but, being who I am, I was not satisfied and made a second one named the Scorcher.
Then I thought, " . . . but if I just make a few changes, I will meet my goal of making the machine I always wanted."
And so, the Scorcher II was born.
I sold one with newly designed hand pieces to a friend, Rick Cannon, and now that he has been using his Scorcher II, he stated, "you really have something here and there is nothing on the market like it."
He encouraged me to sell them.
That was NOT my plan when I made Scorcher II.
However, contact me and I will consider making and selling a Scorcher II with the hand pieces.
Enjoy the videos below and email me if you have questions.
Larry AT sefton DOT info
Tuesday, April 16, 2024
Mandala on Black Walnut
Mandala on Black Walnut was inspired by my younger son when he loaned me a coloring book of easy mandalas.
One mandala was the perfect design for this hollow form that had been sitting idle for four months waiting for inspiration.
Tuesday, March 19, 2024
Pima Design Basket Illusion
Beaded with 1/8" beads and pyrography (most of my beaded platters feature 3/16" beads).
Actual size of Pima original platter is unknown, but I estimate that this 10" platter is 50% of the original.
Monday, January 29, 2024
Potential
Wednesday, January 17, 2024
Delicacy
Delicacy was inspired by and started at Arrowmont School of Arts and Craft located in Gatlinburg, Tennessee during a one-week class with J. Paul Fennell. Class was titled: Embellishing Wood Vessels: Simple Tactile Designs to Elegant Narrative Expression.
In my 19 years of woodturning, Paul was one of the best instructors I've had.
The piece was finished three weeks after returning home.
Sunday, June 25, 2023
A Gift for Our Neighbors
Saturday, June 24, 2023
MSWG June President's Challenge - Anything with a Lid
Friday, June 23, 2023
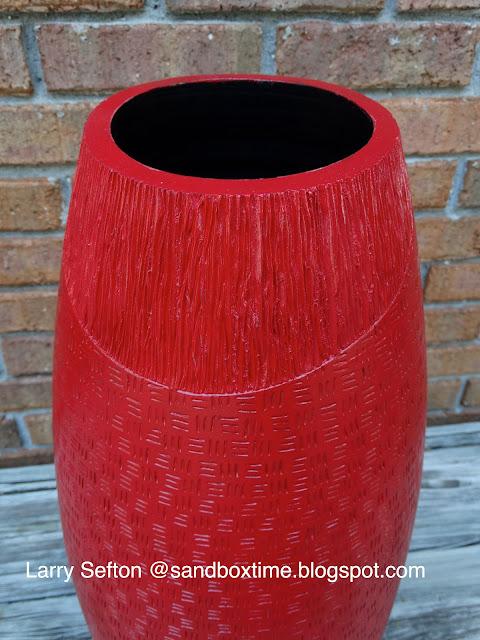
Introducing Big Red
Big Red - hollow form turned from Bradford Pear.
21" tall with 10" diameter
Thursday, February 2, 2023
The Making of Eternity
Friday, August 12, 2022
Shaping the Top for a Wig Stand
Here I am in the process of making the top for a wig stand from MDF (Medium Density Fiberboard).
MDF is dusty to work with, so watch closely and you can see the dust being controlled by the large fan in a window behind my lathe. (off-screen to the right).
This is the easiest to view if you click to enlarge the video to full screen.
Thursday, July 7, 2022
Wednesday, June 29, 2022
Demonstration for Mid South Woodturners Guild - Complete
On Saturday June 25, 2022, I did a demonstration for my woodturning club - Mid South Woodturners Guild (MSWG).
During the demo I went through the complete process of making a wig stand using MDF (medium-density fiberboard) and furniture found curbside (as in put out for the trash) or at Goodwill's last-chance bargain annex.
The link below goes to a related post shared on MSWG's blog:
Wig Stand Demonstration - Completing the Paperwork (midsouthwoodturners.com)


.JPG)
.JPG)
.JPG)


.JPG)

.JPG)
.JPG)

.JPG)
.JPG)


.JPG)

.JPG)